Knitting and Crochet Forum banner
1 - 16 of 16 Posts

suedenie

· Registered
Joined
·
1,182 Posts
Discussion starter · #1 ·
I've just read in a knitting machine book that it might be possible to make your own punch card for the knitmaster KH160 .This is 18 hole card. Wether it works or not is anyones guess. They suggest laminating a piece of A4 paper with same size squares as original punch card, cut out same shape as original punch card, and then punch holes. on laminated paper, its worth a try.
 
suedenie said:
I've just read in a knitting machine book that it might be possible to make your own punch card for the knitmaster KH160 .This is 18 hole card. Wether it works or not is anyones guess. They suggest laminating a piece of A4 paper with same size squares as original punch card, cut out same shape as original punch card, and then punch holes. on laminated paper, its worth a try.
Paper ones will also work. Best with "cover stock" paper.
Aren't photocopiers wonderful.
 
Well, it does work. I already tried it. Use thin paper, if you laminate it, otherwise the cover stock would be better.
But if you have a puncher with a safety like the Brother models, then you'll need to use a pinboard pin or thumbtack to make the "pilot holes" first or the puncher wont work. And that's a lot of work unfortunately.
 
It is theoretically possible to use a blank punch card of any gauge because the framed area around all of them is the same width, 108mm. The holes that are punched have the same physical distance as the needles of that gauge machine. That's why the repeats are 12 x 9mm, 18 x 6mm, 24 x 4.5mm, and 30 x 3.6mm which all multiply to 108mm. I didn't know that for the longest time. The distance between rows is the same and so are the holes at the sides.

24-stitch cards are probably the least expensive and easy to find these days, that's what I used to make punch cards for my MK70. I also used the free graph paper program here:
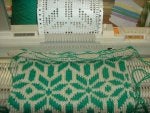
http://download.cnet.com/Graph-Paper-Printer/3000-2064_4-10635500.html . It's a small program and works from my external hard drive. I used the settings in the picture below.

I marked the pattern on the paper with a circle in each appropriate square as well as two rows of circles above and below the beginning and end and used a fairly thick, pointed needle to make the guide hole in each circle. Each square has a cross so it is easy to find the center. I cut the paper around the outlines and taped it to the blank card, matching the edges and rows. I punched the holes through both paper and card with the card puncher, then removed the paper. Or one could tape the paper with the pattern on the card right away, punch the guide holes first and then punch the actual holes with the puncher.

It may be possible to punch a separate section of card with maybe four to six rows of holes and use it to join the beginning and end of any card with card snaps so one wouldn't have to punch the four rows each time? Haven't tried it though. The card worked on my machine without errors. More work than the real thing but at least the holes at the sides are already there.
 

Attachments

Thank you for the fabulous explanation. I think the Passap deco has 40 instead of 24 holes so I was thinking I would sacrifice one Passap card by cutting out the center then tape on the Brother card punched properly spaced so it would feed. Does that sound reasonable? Thank you for the link to the graph paper program. Your LK 160 fabric came out great! Linda :)
 
HeidiMargret, thank you very much for your post.You have explained how to do this brilliantly and it will save a lot of knitters time laminating paper, cutting it to the correct size and making holes down each side. I wonder why this hasn't been suggested before.....clever you. :thumbup:
 
Linda, unfortunately the feeding holes at the sides of Passap cards do not line up with those on the cards for Japanese punch card machines like Brother and Singer.

Are they no longer making blank cards for Passap machines? I seem to remember that the cards for the Passap and the Deco were the same except that the Passap had an extra column of rows at the sides that one might trim off and use with the Deco. I have several Passap machines but haven't used them very much to my regret.

One possibility. If a double layer will feed through the Passap mechanism, one could punch out all the holes on an existing card. Create a template with the right spacing, punch out the holes for the pattern on the paper. Or maybe put paper over thin plastic like a sheet protector (easier to remove for re-use), punch out pattern. Tape the paper or the plastic to the card at the sides beginning just above the three rows of holes at the bottom and ending just below them at the top. There is really no solid space at top or bottom to tape to though. That might be a problem for a card of that width. But it would be convenient not to have to punch six rows of holes every time. There is surely a way...
 
Thanks, I think that is what I was thinking of, using a passap card as a frame to feed then taping the new punched card to it. I just found a box with blank Passap cards so now I don't have to sacrifice the one blank card I have. I will try your suggestions. I do believe there is a solution to each problem. I will have to wait until the DM 80 arrives and it may be a few more weeks. Thanks for your help. Linda
 
1 - 16 of 16 Posts