

This morning I got up and thought of this new way of cast-on. You know how it is sometimes, if you thought about it, someone else may have done it too. So although, I thought about it myself, I'm not sure whether I can claim it of my own. Nevertheless, here it is.
I call this cast-on technique as the "Zig-Zag Crochet Cast-on". It gives a full decorative edge and it minimizes curling as well. The purl side is flat.
Technique: Do 1 row of crochet cast-on technique. Yes, it's the same as the Latch Tool cast-on. Link to Diana Sullivan's tutorial is shown below the 1st photo. Repeat 2 more times going in the opposite direction. It's like 3 rows of crochet in a zig-zag way. You will end on the same side of the carriage. Thread the yarn into the carriage and carry on with your machine knitting. This is what it looks like:
![Image]()
Latch Tool Cast-on Tutorial:
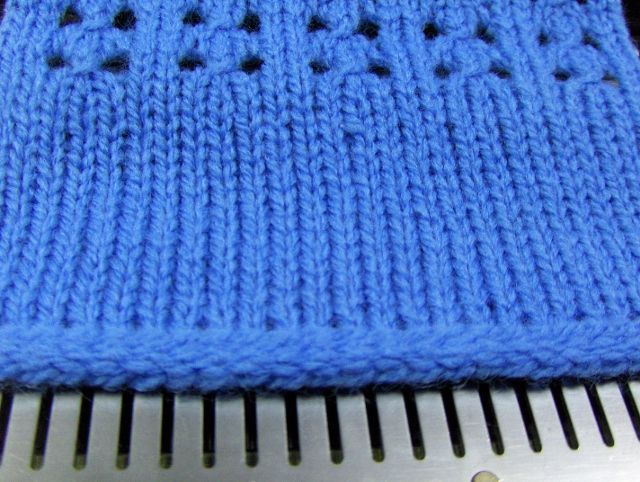
Below is the finish look.
![Image]()
By the way, if you're curious about the stitch pattern way at the top of the last photo, it is the "sl1-k2tog-psso" done in machine knitting.
Happy Knitting!
I call this cast-on technique as the "Zig-Zag Crochet Cast-on". It gives a full decorative edge and it minimizes curling as well. The purl side is flat.
Technique: Do 1 row of crochet cast-on technique. Yes, it's the same as the Latch Tool cast-on. Link to Diana Sullivan's tutorial is shown below the 1st photo. Repeat 2 more times going in the opposite direction. It's like 3 rows of crochet in a zig-zag way. You will end on the same side of the carriage. Thread the yarn into the carriage and carry on with your machine knitting. This is what it looks like:

Latch Tool Cast-on Tutorial:
Below is the finish look.
By the way, if you're curious about the stitch pattern way at the top of the last photo, it is the "sl1-k2tog-psso" done in machine knitting.
Happy Knitting!
")


